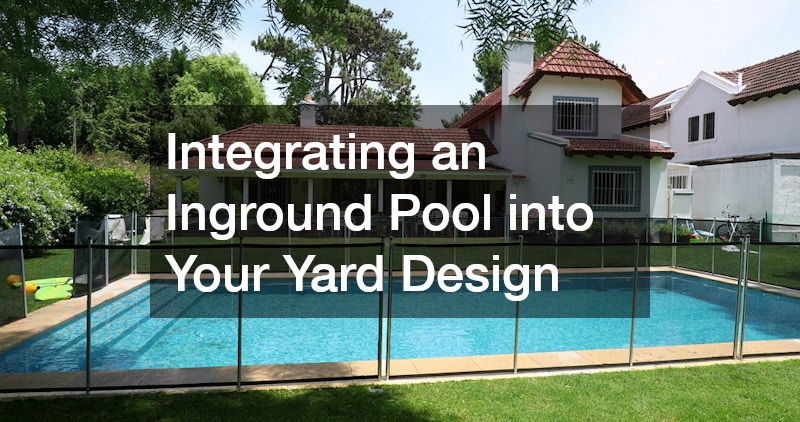
An inground pool serves as more than just a refreshing oasis where loved ones can escape the sweltering heat of summer. It epitomizes an exquisite architectural enhancement that elevates the aesthetic and functional value of your home environment. When envisioned without foresight, a pool risks becoming little more than a rigid, reflective blue oblong awkwardly set amidst an expanse of lawn, devoid of charm or integration with its surroundings. However, when meticulously designed and woven into the fabric of your outdoor area, a pool transforms into an astonishing centerpiece. It emerges as the crowning jewel that harmonizes and enhances your indoor-outdoor living spaces, offering an all-encompassing and luxurious backdrop for leisure and entertainment.
To attain such a synergistic and visually appealing landscape, it’s imperative to adopt a comprehensive perspective when evaluating your backyard space. This involves intertwining the precise, functional elements of pool construction – which ensure effective water containment and safety – with the gentle, fluid contours of the natural surroundings. By focusing on this integration, you can create a serene environment that respects and complements the existing ecology and aesthetic. Moreover, compliance with local safety standards and a thorough understanding of your household’s daily routines are crucial in fashioning a pool area that is both practical and idyllic. This extensive guide is designed to navigate you through essential stages of development, guiding you step-by-step in morphing your backyard into a luxurious haven, reminiscent of a resort’s pristine environment.
How to Evaluate Your Yard’s Topography and Sunlight Patterns

Before anyone touches a shovel, you must spend time studying the unique environmental characteristics of your property. Microclimates exist in every backyard, dictated by the movement of the sun, prevailing wind patterns, and the slope of the land. Mapping these elements early prevents costly structural mistakes and ensures your pool is positioned for maximum enjoyment.
Sunlight is the primary lifeblood of any swimming pool area. Ideally, you want to position the water where it will receive the maximum amount of direct afternoon sun, which naturally warms the water and extends your swimming hours. Conversely, you must look upward at the existing canopy. Large, overhanging branches cast unwanted shadows and drop an endless stream of leaves, needles, and sap directly into your water filtration system.
To evaluate your site effectively, follow this diagnostic checklist:
- Track the sun at three critical points of the day: 10:00 AM, 2:00 PM, and 6:00 PM. Mark the high-sun zones with stakes to identify your optimal pool placement.
- Identify the windward side of your yard. Heavy winds accelerate water evaporation and rapidly cool down a heated pool, so you may need to plan for structural or natural windbreaks.
- Check the grade of your soil. A slope of more than a few inches across the pool footprint means you will need to plan for grading or retaining structures.
- Check for underground utilities or easements that could restrict where heavy excavation machinery can safely operate.
- Observe your yard during a heavy rainstorm to see how surface water naturally flows and where it tends to pool.
Navigating these early stages requires a blend of heavy engineering and botanical preservation. Consulting with experienced inground pool companies early in the process ensures that soil stability, high water tables, and property setbacks are factored into the initial blueprints. Simultaneously, you should bring in local tree services to assess the health of nearby mature trees. A professional arborist can carefully prune back limbs to clear the sky above the pool while implementing root-barrier techniques to save the root systems of legacy trees you want to keep for privacy.
Creating Seamless Traffic Flow Between Indoor and Outdoor Spaces
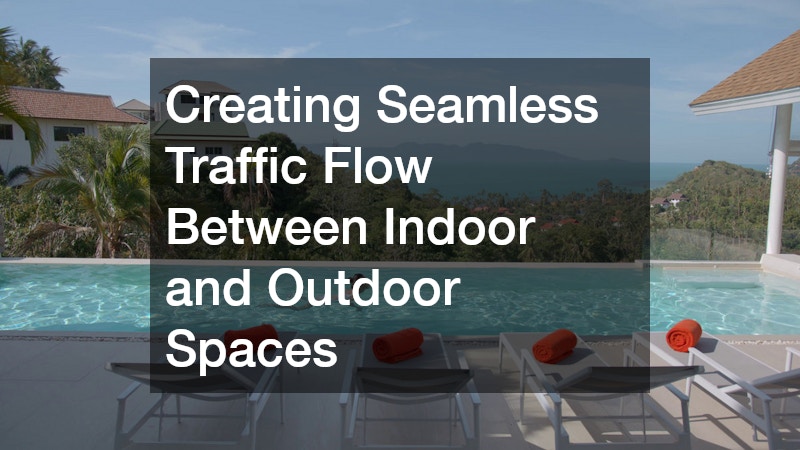
Once the location of the pool is established, your attention must shift to how people will move between your home and the water. A successful design masterfully handles the transition zones, preventing the backyard from feeling fragmented. The journey from the back door to the water’s edge should feel intuitive, safe, and visually engaging.
The most effective way to manage this movement is by separating your landscape into distinct functional zones. The area immediately outside your backdoor should ideally serve as a dry zone, designated for cooking, outdoor dining, and lounging away from splashing water. As you move further into the yard, the landscape should transition into a wet zone immediately surrounding the pool. This layout prevents wet feet from tracking water across expensive dining areas or inside the house, reducing both slip hazards and interior floor damage.
Consider these design principles when mapping out your walkways and transition areas:
- Maintain a minimum walkway width of four to five feet for major arteries to allow two people to walk comfortably side-by-side.
- Choose flooring materials that offer a high coefficient of friction when wet, ensuring that children and guests can walk safely without slipping.
- Use contrasting textures or border colors to visually signal a transition from a dining area to a wet pool deck.
- Establish a dedicated, easily accessible storage area for towels and pool toys along the main pathway to reduce clutter.
- Arrange your outdoor furniture so that it guides the natural flow of foot traffic around lounging zones rather than directly through them.
Executing these transitions beautifully requires a blending of different structural materials. Specialized deck and patio builders can construct elevated wooden or composite structures that extend your indoor flooring right out into the open air, bridging the gap between your home’s threshold and the ground level. From there, a professional paving company can take over to lay down durable, interlocking concrete pavers or natural stone walkways. These paving materials create a elegant, resilient pathway that easily handles pool chemical runoff and seasonal freeze-thaw cycles without shifting or cracking.
Elevating Your Poolside with Multi-Level Features and Retaining Walls
When a pool deck is perfectly flat and uniform, it can quickly feel sterile and industrial. Incorporating dimensional variety into your hardscape design introduces texture, depth, and a high-end architectural feel. By utilizing vertical elements and playing with different elevations, you break up the flat visual plane of the water and ground the pool into the surrounding landscape.
If your yard possesses a natural slope, do not view it as a detriment; view it as a design opportunity. A sloped yard allows for the creation of multi-tiered terraces. You can place the pool on a lower tier, creating a dramatic overlook from an upper dining patio. Vertical masonry elements, such as stone water features, built-in planters, and low retaining walls, can also double as additional seating areas, maximizing the usability of your footprint without overcrowding the deck with bulky outdoor furniture.
To introduce vertical interest effectively, focus on these actionable ideas:
- Install a raised stone bond beam along one side of the pool, turning a functional retaining wall into a beautiful cascading waterfall feature.
- Create built-in masonry planters filled with cascading ornamental grasses to soften the transition between stone decks and natural soil.
- Incorporate a sunken fire pit lounge adjacent to the pool edge to create a dramatic contrast in heights and a cozy gathering space for cool evenings.
- Design wide, shallow stone steps connecting the different tiers to make transitioning between levels feel grand and effortless.
- Use contrasting capstones on top of your retaining walls to give the structural masonry a crisp, finished look.
Bringing these complex, multi-dimensional elements to life requires skilled craftsmanship. A qualified hardscape installer can build the structural stone walls, steps, and coping stones needed to anchor your pool beautifully into the earth, preventing soil erosion and ensuring long-term structural integrity. In regions prone to intense sun or heavy seasonal bugs, integrating custom screen enclosures into these hardscape structures can elevate comfort, allowing you to enjoy your multi-level oasis protected from pests and intense ultraviolet rays.
Meeting Local Pool Safety Codes Without Sacrificing Visual Appeal
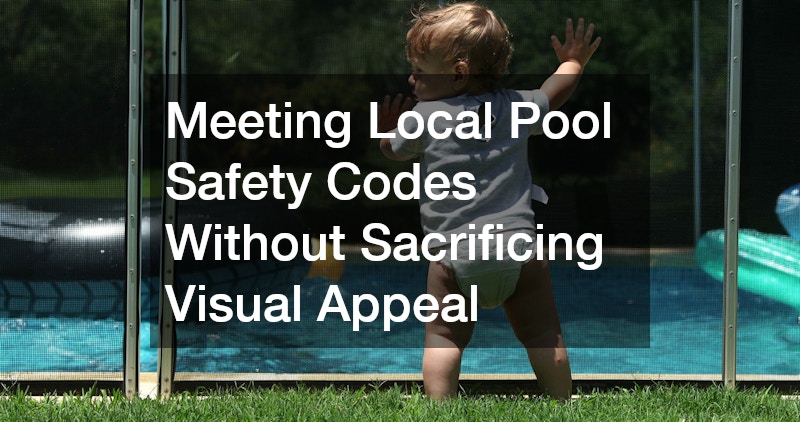
Safety is the non-negotiable anchor of any pool design project. Municipalities enforce strict residential pool codes to prevent accidents, but meeting these guidelines does not mean your backyard has to look like a commercial facility or a high-security compound. With creative planning, your safety barriers can blend seamlessly into your aesthetic vision.
The primary legal hurdle is the perimeter barrier, which typically requires a fence at least four or five feet high with self-closing and self-latching gates. Instead of installing a basic chain-link or standard white vinyl fence directly around the water’s edge—which shrinks the feel of the pool area—consider pushing the safety perimeter out to the property line or hiding it within your landscaping layers. By using dark, slender aluminum balusters or clear glass panels, the barrier virtually disappears against the backdrop of your trees and shrubs, preserving your open views.
Keep these safety and integration tips in mind during the layout phase:
- Layer your plantings by placing low shrubs in front of your safety fence to soften its hard lines and mask its presence from view.
- Ensure all access gates swing outward, away from the pool area, and are equipped with magnetic latches positioned out of the reach of small children.
- Eliminate any potential footholds or horizontal rails on the exterior side of the fence that adventurous children could use to climb over.
- Choose a dark fence finish, like matte black or bronze, which naturally recedes into the surrounding green foliage far better than white or silver.
- Verify that any perimeter windows or doors leading directly from the house to the pool are equipped with code-compliant safety alarms.
Achieving a secure yet beautiful boundary requires coordinating with professional fencing services that understand the exact specifications of local pool safety laws. They can install compliant, high-quality perimeter structures that keep your family safe and your property legally protected. Furthermore, a pristine pool environment requires keeping pests at bay; working with a proactive pest control company during the landscaping phase allows you to address standing water risks, treat the surrounding soil, and install barrier controls that keep mosquitoes, wasps, and spiders away from your backyard sanctuary.
Layering Your Outdoor Illumination for Nighttime Safety and Mood

The utility of your inground pool should not expire when the sun goes down. In fact, a masterfully lit pool and landscape can be even more breathtaking at night than it is during the day. Proper outdoor illumination serves a dual purpose: it guarantees the safety of night swimmers by illuminating steps and edges, and it transforms your yard into a dramatic, theatrical space.
The secret to high-end outdoor lighting is layering. Avoid the temptation to mount large, harsh floodlights on the back of your house, which creates blinding glares and deep, ominous shadows. Instead, focus on low-voltage LED fixtures hidden within the landscape itself. Use uplighting at the base of mature trees to accentuate their architectural bark, place soft downlights in your patio rafters to mimic natural moonlight, and install subtle path lights just inches off the ground to safely guide footsteps along walkways.
Implement these lighting strategies for the best nighttime ambiance:
- Position low-voltage path lights in a staggered pattern along walkways rather than a straight line to avoid a runway look.
- Use underwater LED lights that can change colors, allowing you to match the water’s glow to the mood of an evening gathering.
- Install subtle under-cap lighting beneath stair treads and wall coping to clearly define changes in elevation and eliminate trip hazards.
- Incorporate dimmable zoning controllers so you can easily shift the atmosphere from bright and energetic to soft and romantic.
- Aim fixtures away from gathering areas to prevent glare from shining directly into the eyes of sitting guests.
Executing a flawless electrical and lighting plan near body-of-water zones requires specialized expertise. Hiring a certified landscape lighting contractor is essential for installing low-voltage transformers, running waterproof conduit, and selecting fixtures that can withstand exposure to chlorinated or saltwater mist. Additionally, while preparing the physical landscape for these wiring trenches, you may disturb hidden subterranean spaces; if you discover local wildlife nesting underneath old structures or near your new water lines, reaching out to animal removal services ensures these creatures are relocated humanely, keeping your construction site safe and preventing pests from damaging your new outdoor investment.
Integrating an inground pool into your yard design is an intricate puzzle that rewards patience, meticulous planning, and professional collaboration. By taking the time to study your property’s natural topography, establishing logical traffic zones, utilizing multi-level hardscapes, and prioritizing elegant safety and lighting solutions, you can avoid common design pitfalls. The final result will be far more than a place to swim; it will be a beautifully unified extension of your home where memory-making happens effortlessly for decades to come.